


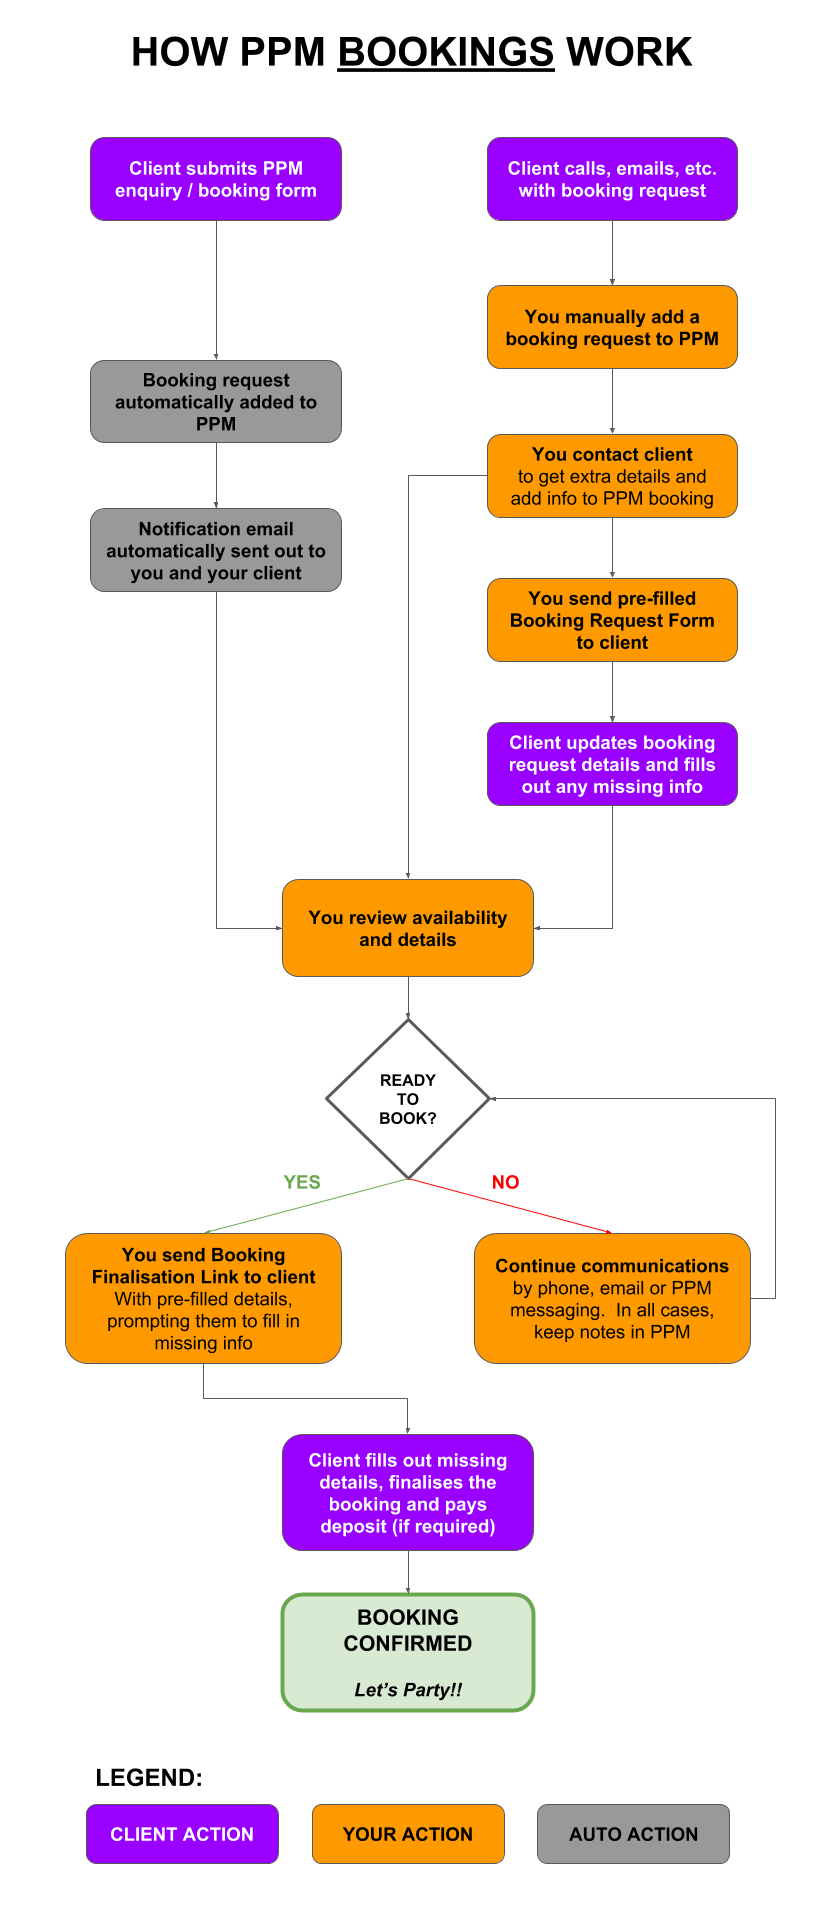
Firstly, let’s have a look at the full flow a new party/event booking goes through with PPM:
A note for those with staff:
This particular tutorial focuses purely on the process and interactions involving you and your client. PPM also provides extensive staff scheduling facilities (depending on your chosen plan). We have a separate tutorial (coming soon), with guidance for how to also schedule staff as part of your A-Z booking process.
With that said, let’s get started on processing your first booking!
First, you need to navigate your way to the Events page:

Step 1: Add a new Event -OR- Review an enquiry / booking request already submitted online.
If a client contacts you by phone, email, text, etc, but doesn’t fill out your online PPM booking request form, your first step is to add an Event record to your PPM account.
You don’t necessarily need to know all of the event details at this stage (or even the date). You can start by entering the info you do know, and fill out the rest later in the process.
To do this, click the orange “+ EVENT” button located in the top left corner.
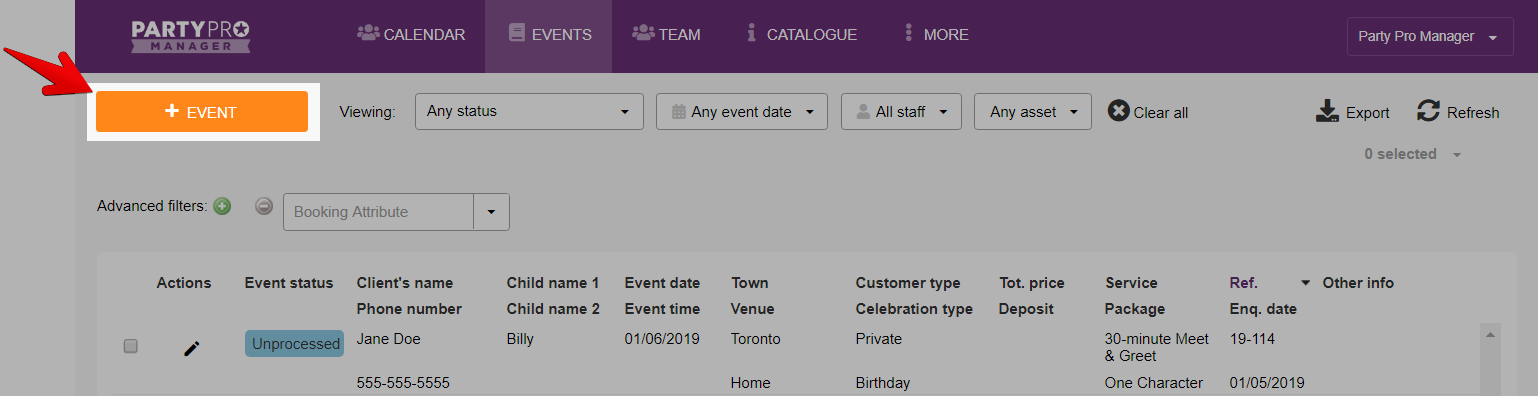
If your client has made their request by filling out your online PPM Enquiry or Booking Request Form, they will automatically be added to your Events list, with their status as “Unprocessed”. You’ll also receive an email notification with the details of their request. Click on the edit (pencil) icon to open up any particular event to review and edit its details.

PRO TIP: You can filter your Events list. One option is to filter by status. By selecting “Unprocessed”, you’ll get a filtered list showing you all of your new event enquiry / booking requests that still require your attention.

Once you’ve clicked to either add or edit an event, a new window will popup for you to add/edit the details of your event.
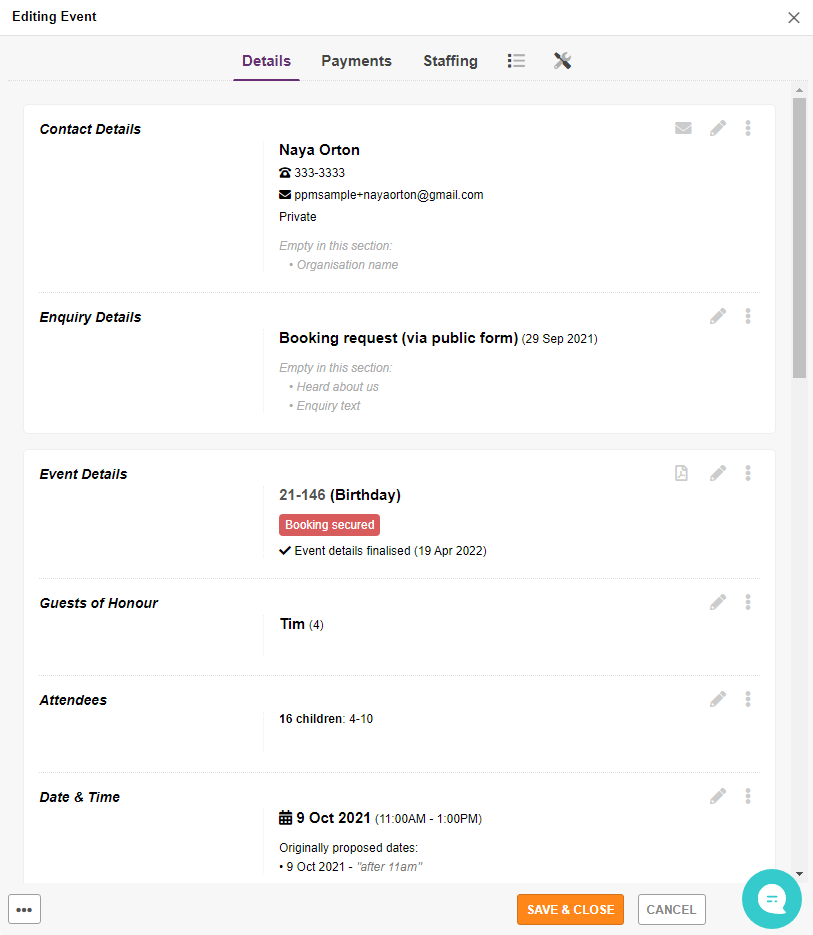
Click here for a complete overview of your Event Editor and all the options within it.
Step 2: Ascertain and fill out all the required Event details
It may be that you already have all of the required details from step #1. If so, you can jump right ahead to step #3. (Do not pass go, do not collect £200 - or other currency) 😉
Or if you do have further info to discuss / fill in (including exploring alternative dates and times with your client), you have a couple of options available...
Option A: Send client a pre-filled Booking Request Form
You may want to send the client a pre-populated Booking Form, for them to review the details you do have and add in any missing information. (This saves your client having to-reenter details that are already known, like they would if the were to submit a fresh Booking Request - as well as avoiding creating a duplicate entry for the same event)
To do this, make sure you’ve created your event by clicking the “OK” button.
Then, open your newly created event by clicking on the edit (pencil) icon for this event in your Event List.
Navigate to “Utilities > ‘Booking Request’ Link”.
Click the “Generate link now” button.
Copy this link and email it to your client.
Once the form is completed by the customer, the following automated actions will occur:
- The client will receive a copy of their Booking Request via email.
- You will be sent notification via email
Option B: Continue communications with your client
It’s worth remembering, at any point in your PPM booking process you always have the option of picking up the phone, sending a text or sending a carrier pigeon.
OK, maybe use the last one as a last resort, but the point is, PPM is there to facilitate as much as your process as possible, whilst it never prevents you from doing anything you’ve always done and may want to continue doing.
In addition to external communication options, there’s a powerful emailing facility built directly into PPM, for sending either a specific message or question or quickly sending common emails (set up as Standard Texts).
When you feel you've collected enough details and have them entered into PPM, you’re ready for step #3...
Step 3: Send Booking Finalisation Link to Client
Once you’ve reviewed all the details and verified that you are, in fact, available for this Event, it’s time to finalise the booking, yay!
To do this, first you should look over the Event Info again to be sure all the details are correct.
⚠️ You’ll also want to ensure you have a date, time and price set.
When you’re confident everything looks good to go, it's time to send the client their Finalisation Link (a.k.a. Confirmation and Payment Form)
This is where you can generate a web link to a confirmation form which allows your client to review the booking and fill in any required missing details and make any necessary payments (e.g. Deposit, Full Payment, or Final Balance)
Once completed by the customer, the following automated actions will occur:
- Your client will be prompted for their deposit payment, with relevant payment link or details provided (Assuming you have your payment options configured under Account Settings, and have specified a deposit amount for the Event)
- The booking will be set to 'Awaiting deposit' status.
- 'Date finalised' will be set below.
- You will be sent notification via email
Step 4: Send Invoice to Client (optional)
Some of our users choose to send a formal invoice to their client in addition to the Booking Finalisation Form.
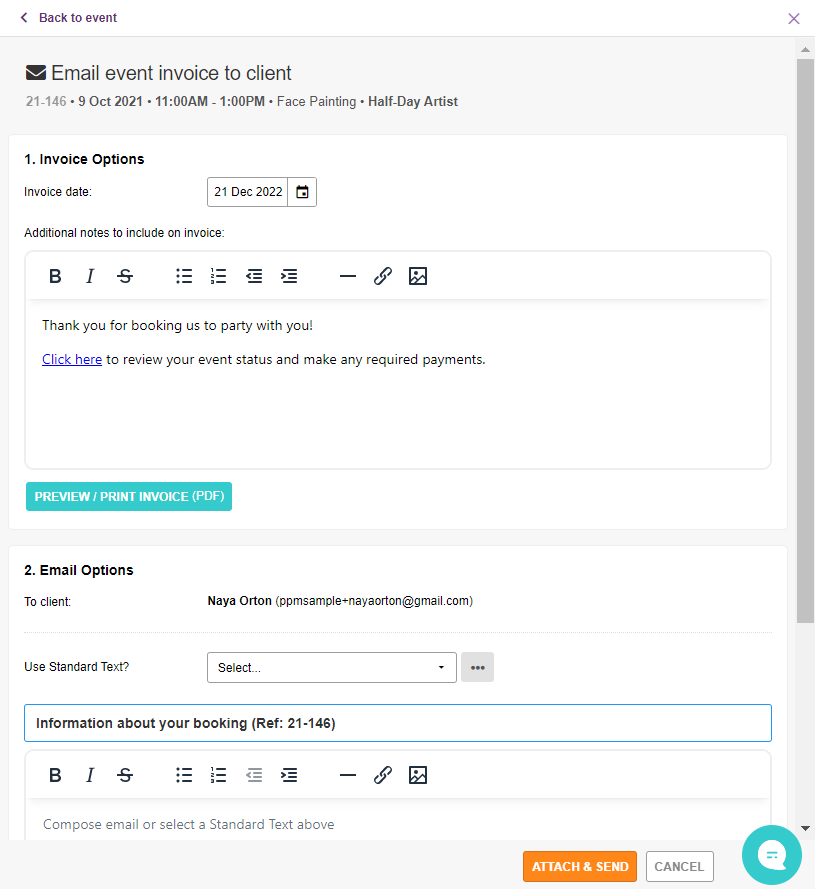
If you’d like to do this, navigate to “Utilities > Invoicing”
Select a “Standard Text” to use or type a message in manually.
If you have any additional notes you’d like to include on the invoice PDF, add them to the “Additional notes” section.
Once everything is filled in you can preview and email the invoice by clicking the appropriate blue button at the bottom.
PRO TIP: You can actually combine Step 3 and Step 4 if you’d like to send both a Booking Finalisation Form and an Invoice to your client. After you’ve copied the Booking Finalisation Link in Step 3, skip ahead to the “Send invoice” section and paste the Booking Finalisation Link into your Message or Additional notes or both!
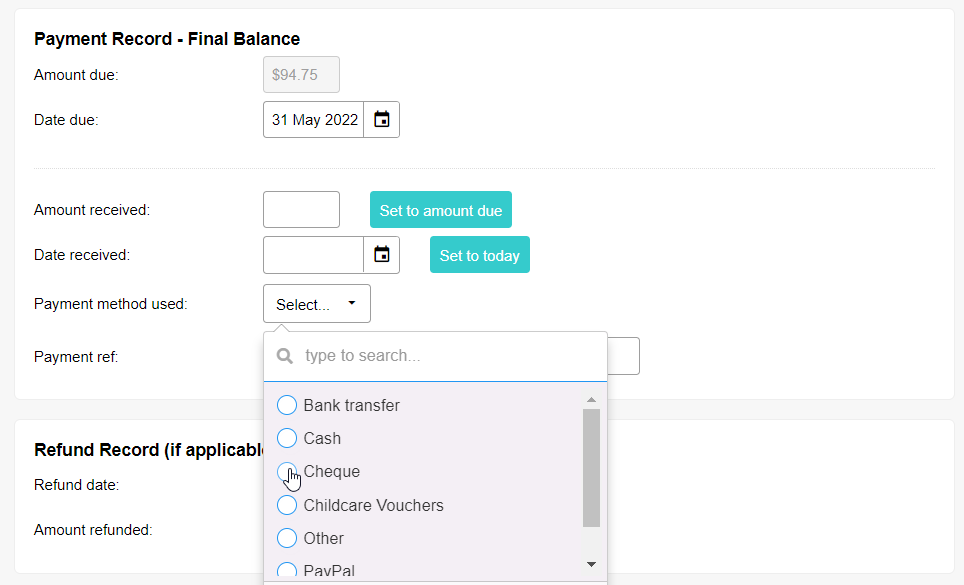
Step 5: Collect and record the final (remaining balance) payment
Depending on your business needs, you may collect your remaining balance payment…
- In advance of the actual event date (e.g. via PayPal, Square, or electronic bank transfer).
- At the event itself (e.g. in cash).
However you like to work, PPM will you support your preferred approach. All you need to do once received, is record the payment method and other relevant details under the Payments > Payment Record sections.
Once the remaining balance is recorded as received, it’s time for the Event to be set to ‘Balance Settled’ status (displayed under the Details > Event Details section).
PRO TIP: To save you the task of manually notifying the client that their payment has been received, be sure to have the appropriate automation options enabled under Settings > Autopilot.